Chapter I is the first chapter chronologically during or after each of the six main characters' opening segments in the 3D version of Trials of Mana.
Its main plot centers around the main character (the Chosen of the Mana Sword) meeting Faerie along with their two companions and discovering how the shift in mana power has affected other parts of the world. They are advised by the Priest of Light to venture in different lands, activate the Mana Stones and collect the elemental Mana Spirits to prevent the Mana Stones From releasing the eight Benevodons. This would give Faerie sufficient magic power to open a portal to the Sanctuary of Mana where the main character will find the Sword of Mana needed to grant their foremost wish. This chapter introduces the first pair of elementals, Lumina and Gnome, and ends with the Hero King's order to find the remaining six spirits.
Story[]

Ludgar threatening the locals
After departing from their homeland to seek the guidance of the Priest of Light, the Chosen enters the docks of Jadd Stronghold only to be met with the town besieged by Beastmen. Our hero quickly learns that they cannot escape the city whatsoever, as Ferolian forces roam the vicinity. During their town exploration, they meet several foreigners sharing the same predicament of being ensnared by the invaders. Finally, after inquiring at the local bar for ways to escape town, they gain valuable information pertaining to the Beastmen's weakness: should they wait until nightfall, the Ferolians would transform into werewolves, losing their self-control in favor of an innate compulsion to brawl with each other. After napping at the inn and waiting for night to come, our main hero wakes up just in time to see the Beastmen changing into their werewolf forms. Seizing their opportunity, the Chosen runs right through the city's front gate to reach Rabite Forest. They quickly traverse these verdant woods, eventually reaching the entrance to Cascade Cavern.
Meanwhile, in the Temple of Light, the young priestess Charlotte awakens from a strange dream and runs into her close friend Heath, who is then called to a meeting with her grandfather. His Eminence speaks of a series of ill omens as well as of disturbing events near Jadd; thus, he sends Heath to investigate the strange light near Lake Astoria. In his turn, Heath recognizes both the impending threat from Jadd and Charlotte's apparent distress, the latter of which he assumes is a result of shifts in mana power. He suggests that the Priest conjure a barrier to protect the sacred city, which the latter does. Charlotte overhears much of the conversation and decides to rush after Heath, as she senses an ill omen of her own. She tries to charge through the front door of the temple, only to be cut off by overbearing temple guards. Desperate to meet up with Heath, Charlotte has to find another way out.
Charlotte meets a young acolyte, Mik, who at first has a slew of reservations about helping Charlotte escape the temple, so she pressures him to do something to help; nevertheless, he has a plan to help her under cover of night. Unfortunately, the springstepper he brought for Charlotte has a mind of its own and launches her to Rabite Forest, where she falls on top of an adventurer in their escape from Jadd. Stunned, the adventurer rushes Charlotte to the lakeside village of Astoria, where she recovers.
Charlotte catches up with Heath the following morning in Rabite Forest, where she watches him being accosted by beastmen. A sinister figure then enters the fray, and spies Charlotte on the edge of the clearing in which Heath stands. He attacks her, but Heath jumps in front of the spell cast toward her. Within moments, Heath simply disappears, leaving Charlotte beside herself as to how to get him back. She starts back to Wendel in hopes of telling her grandfather what has happened.

However, our hero finds themselves bumping into an invisible wall instead of working their way through the cave, hindering their journey to Wendel. Forced to find another way to reach the Holy City, they head to the nearby lakeside village of Astoria. Here they hear some townsfolk gossiping about a strange light hovering on the lake at night. Intrigued by this curious hearsay, our hero concludes that this strange phenomenon might be linked to the magical barrier preventing anyone from venturing inside Cascade Cavern and decides to stay at the local inn for the night. At nightfall, their sleep is rudely interrupted by a bright flash of light coming from outside. Venturing out of the building, they are surprised to see a bright ball of light glistening in the air while swiftly going toward Rabite Forest. At the same time frightened and curious, the Chosen dashes through the forest once again in the dark to follow the will o' wisp.
Faerie's first appearance
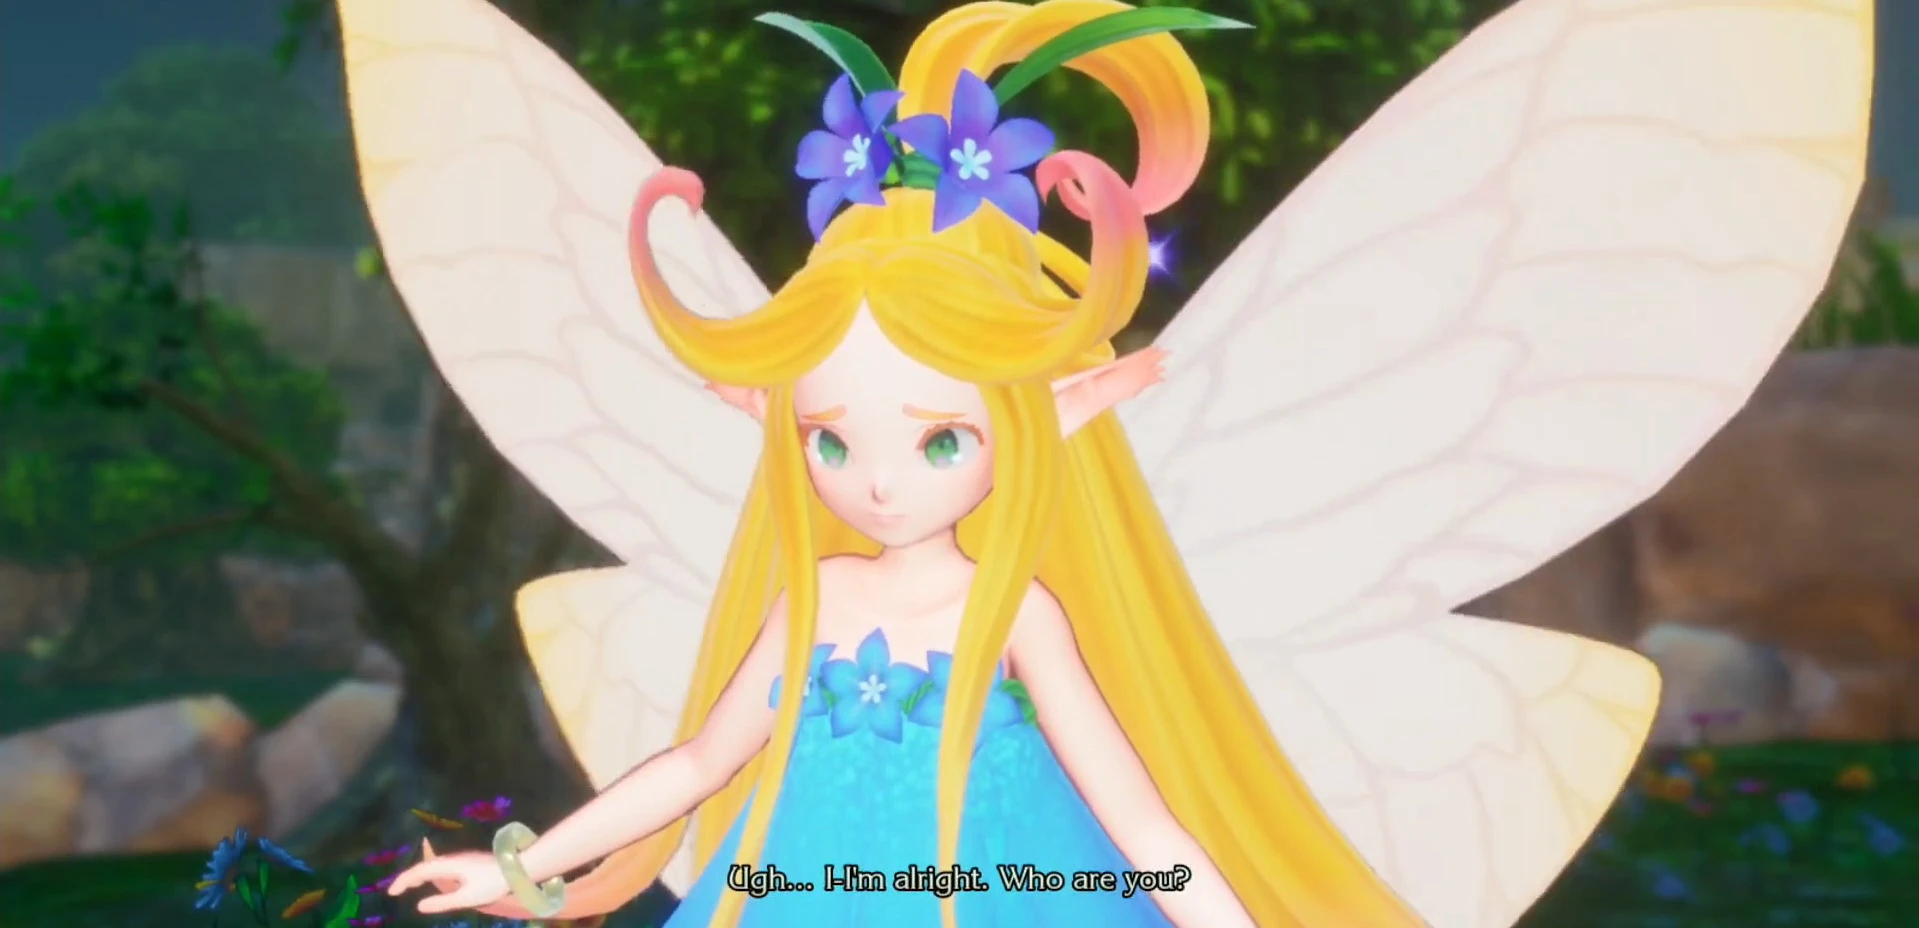
After taking a detour going all the way across the lake, the mysterious light finally fades to reveal a frail and exhausted Faerie in a field near the lake. As the hero checks if the small creature is still alive, the sprite quickly regains consciousness and the two meet officially. Faerie tells the Chosen that she has no other choice but to choose them for a task and implores them to bring her before the Priest of Light. She then adds that she can undo the barrier in Cascade Cavern with her residual magic. Their conversation is suddenly cut short by a loud noise coming from Astoria. Both the Chosen and the Faerie immediately decide to investigate, but the latter takes the opportunity to rest inside the hero's head, which obviously startles them. Hurrying to the village, they find the settlement smoldering and in shambles by the Beastmen. Alarmed that the Ferolian forces might take over the Holy City next, the duo hasten to the cave's mouth to discover another traveler waiting around. The traveler complains that the entrance to Cascade Cavern is blocked, but is delighted to hear that Faerie can disperse it. The traveler decides to join the group and the player has an opportunity to play their Flashback Chapter to learn more about their past.

"If you hadn't been thewe, it woulda been good night Chawwotte!"
As the two heroes venture deeper into the damp cavity, they may run across Charlotte holding onto a steep rocky bridge near a large waterfall with only her bare hands. After the heroes rescue her, Charlotte introduces herself as beauty of Wendel and granddaughter of the Priest of Light. Depending on whether the player has chosen her as the third playable character or not, she joins the party or leaves the twp to their own devices. After finally exiting the cavern and reaching Holy City Wendel, the party eagerly seek to venture into the Temple of Light to seek an audience with the Priest of Light. After listening to each of the playable characters' pleas, Fearie emerges before his Eminence to tell him about the Tree of Mana's withering. Taken aback by those grave news, the Priest of Light reveals to the party that he fears that the eight Benevodons sealed in the Mana Stones will break free if the Mana seal is broken. Seeing the main character's puzzled look, he then adds that they have been chosen by Faerie to retrieve the Sword of Mana from the Sanctuary.

The heroes meeting the Priest of Light
While the Chosen seems displeased at the idea that they have to continue being Faerie's host for their whole life, they quickly change their mind upon hearing that the Mana Sword can grant formidable power and prestige to the wielder. Furthermore, the Sword is the embodiement of the golden wand used by the Mana Goddess to create the world itself. The next objective for the party is to obtain the Mana Sword and awaken the Goddess of Mana once more since only she can bring peace to the realm and grant wishes. Faerie adds that she will open the portal but that she needs the power of the Elementals for that to work since she's lost a lot of her magic already. The Priest of Light then says that there was once a ancient magic spell that was used to control the energy from the Mana Stones and bent it to the user's will. However, various kingdoms refused to let each other cast the spell and this quarrel led to a terrible war that pushed the survirvors to forbid the use of the spell by ending the life of the person casting it. The Priest of Light directs the party to Cascade Cavern, where he heard that the Lightstone and its guardian Lumina lie. Empowered by this information, the party then returns to the grotto to investigate.
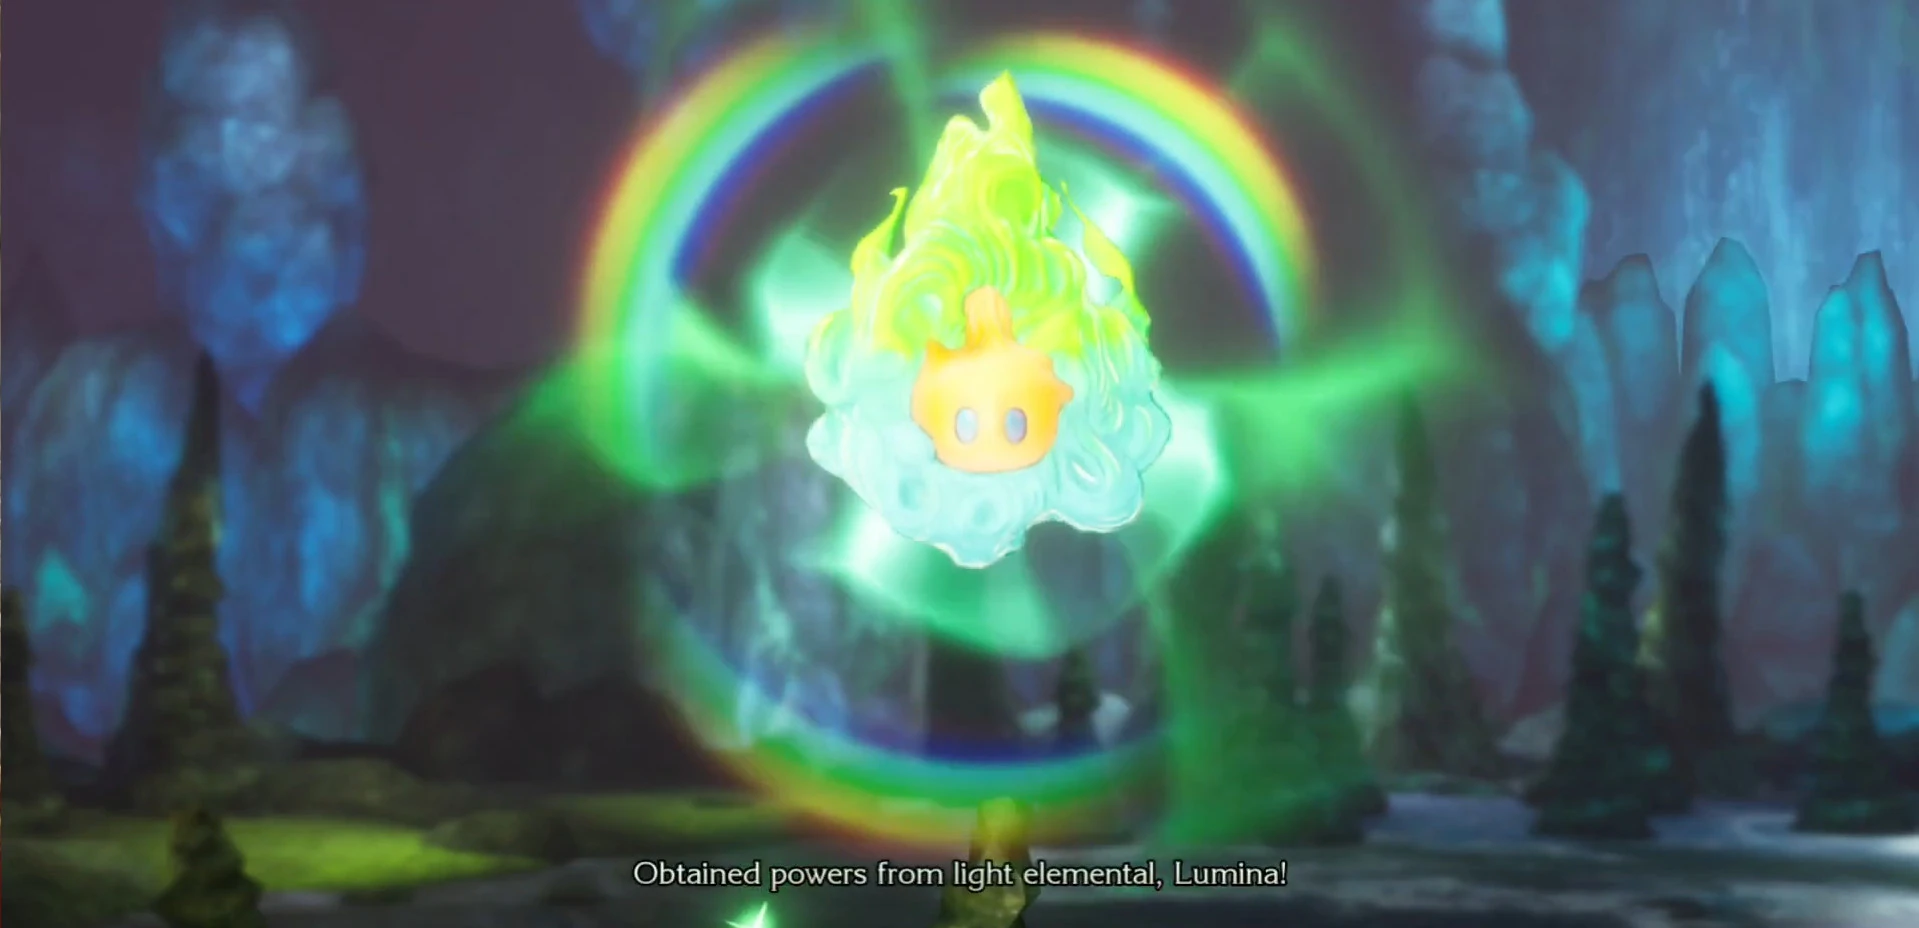
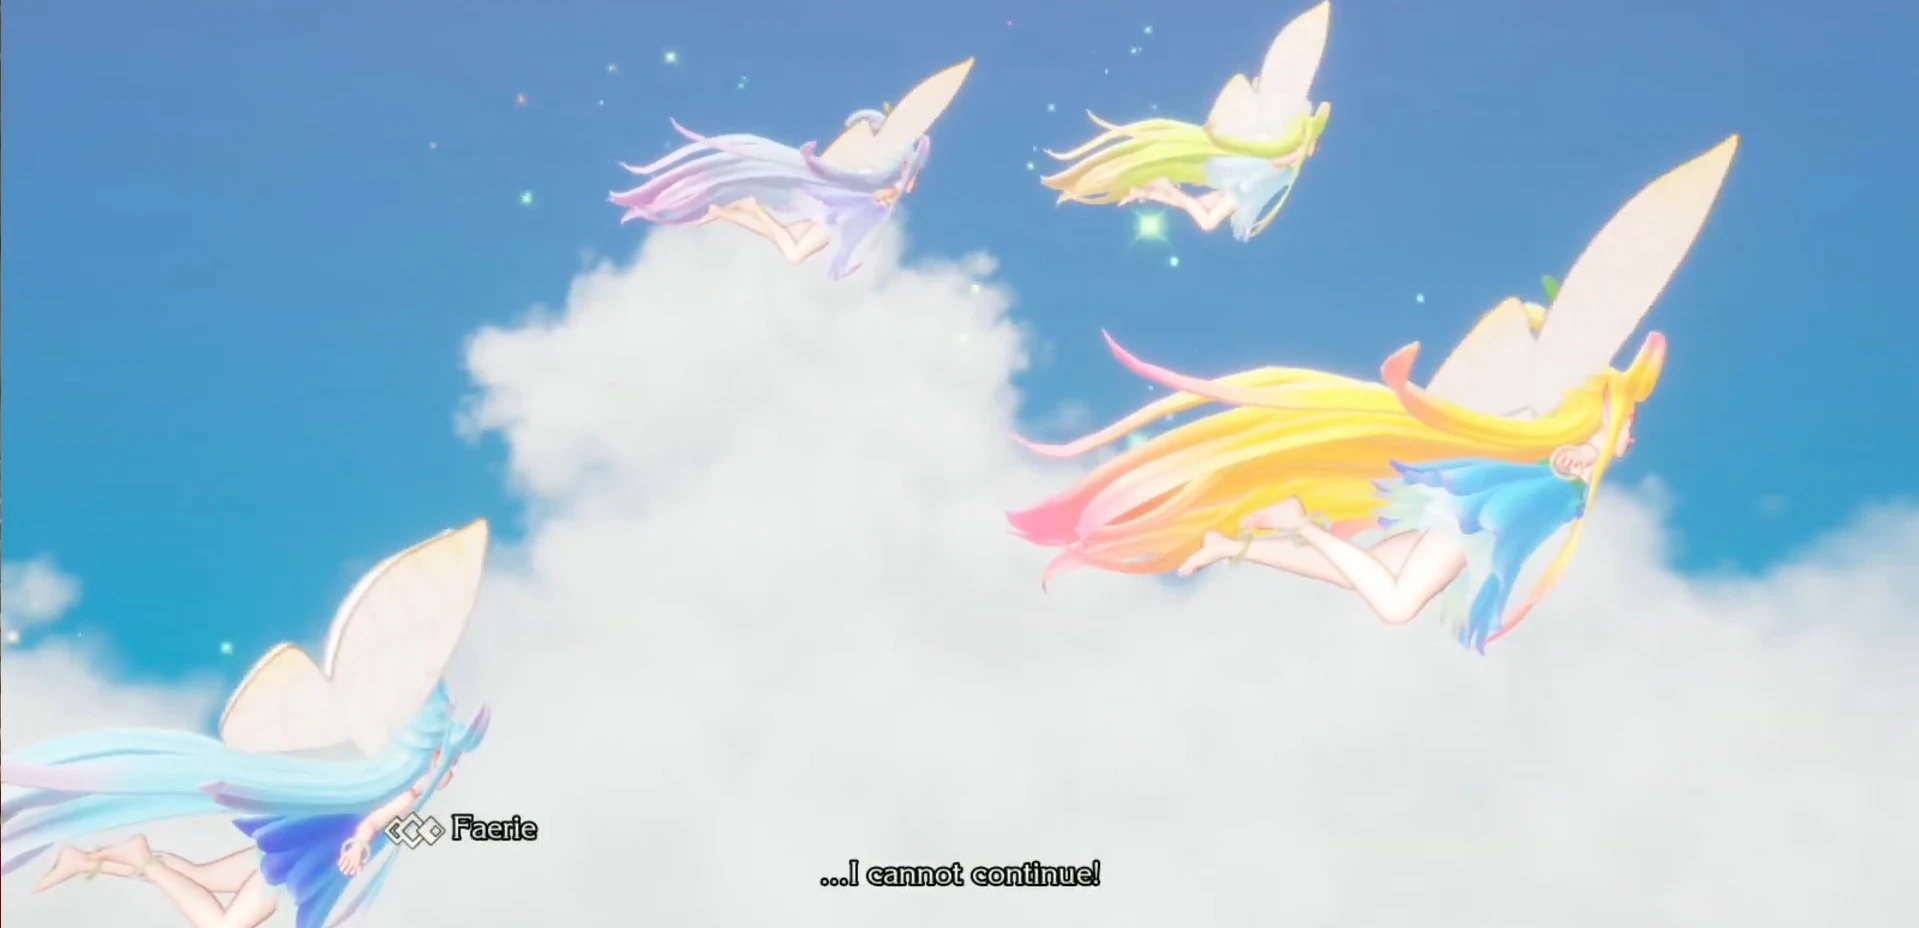
Crossing the central waterfall, Faerie detects a great source of power that she can use to help the party cross a gap further up. She proceeds to teleport the characters to one cliff to another by concentrating the cascade's energy. Heading deeper into the cavern, the chosen warriors meet up with a giant crab who was revealed to guard the elemental of light upon being defeated. Fearie promptly asks Lumina where the Lightstone is located but the elemental sprit replies that it is inaccessible at the moment due to the artifact being on an enclosed ruined site. The light spirit glady joins the party after this exchange and our heroes decide to head back to the Priest of Light for their next objective. However, upon returning to the central waterfall, they are rudely shoved down lower grounds by Beastmen who thank Faerie for taking down the magical barrier at the entrance so that they can invade the Holy City in no time. Distressed by this sudden realization, the pixie flies down toward her unconscious friends not knowing what to do. A flashback of Faerie and her magical kin worrying about the Mana Tree's state in the sanctuary is then shown.
Faeries trying to reach Holy City Wendel
The group of faeries decide to undertake a long trip to seek advice from the Priest of Light. During this excruciating voyage, Faerie's fellows are overtaken by exhaustion bit by bit and slowly faint in agony. Only one—Faerie herself—succeeded in crossing into the mortal realm. The action then transits back to our heroes finding themselves captured and jailed in Jadd Stronghold. Upon crying for help, a fellow prisoner ask the main character to pipe down. This ruckus causes one of the beastmen guard to come down to the prison cells and put the inmates in place. This gives the mysterious prisoner and idea to catch the guard's attention and to trick him into opening their cell door. The plan is ultimately a success and the party is rescued by the other convict. If the third party member is not Charlotte, then the prisoner joins the group at this time. Otherwise, the prisoner is revealed to by Hawkeye and ultimately escapes Jadd all alone. With our heroes newly freed from captivity, they head toward the city docks and jump on a ferry to the Free City of Maia.
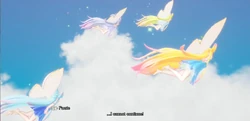
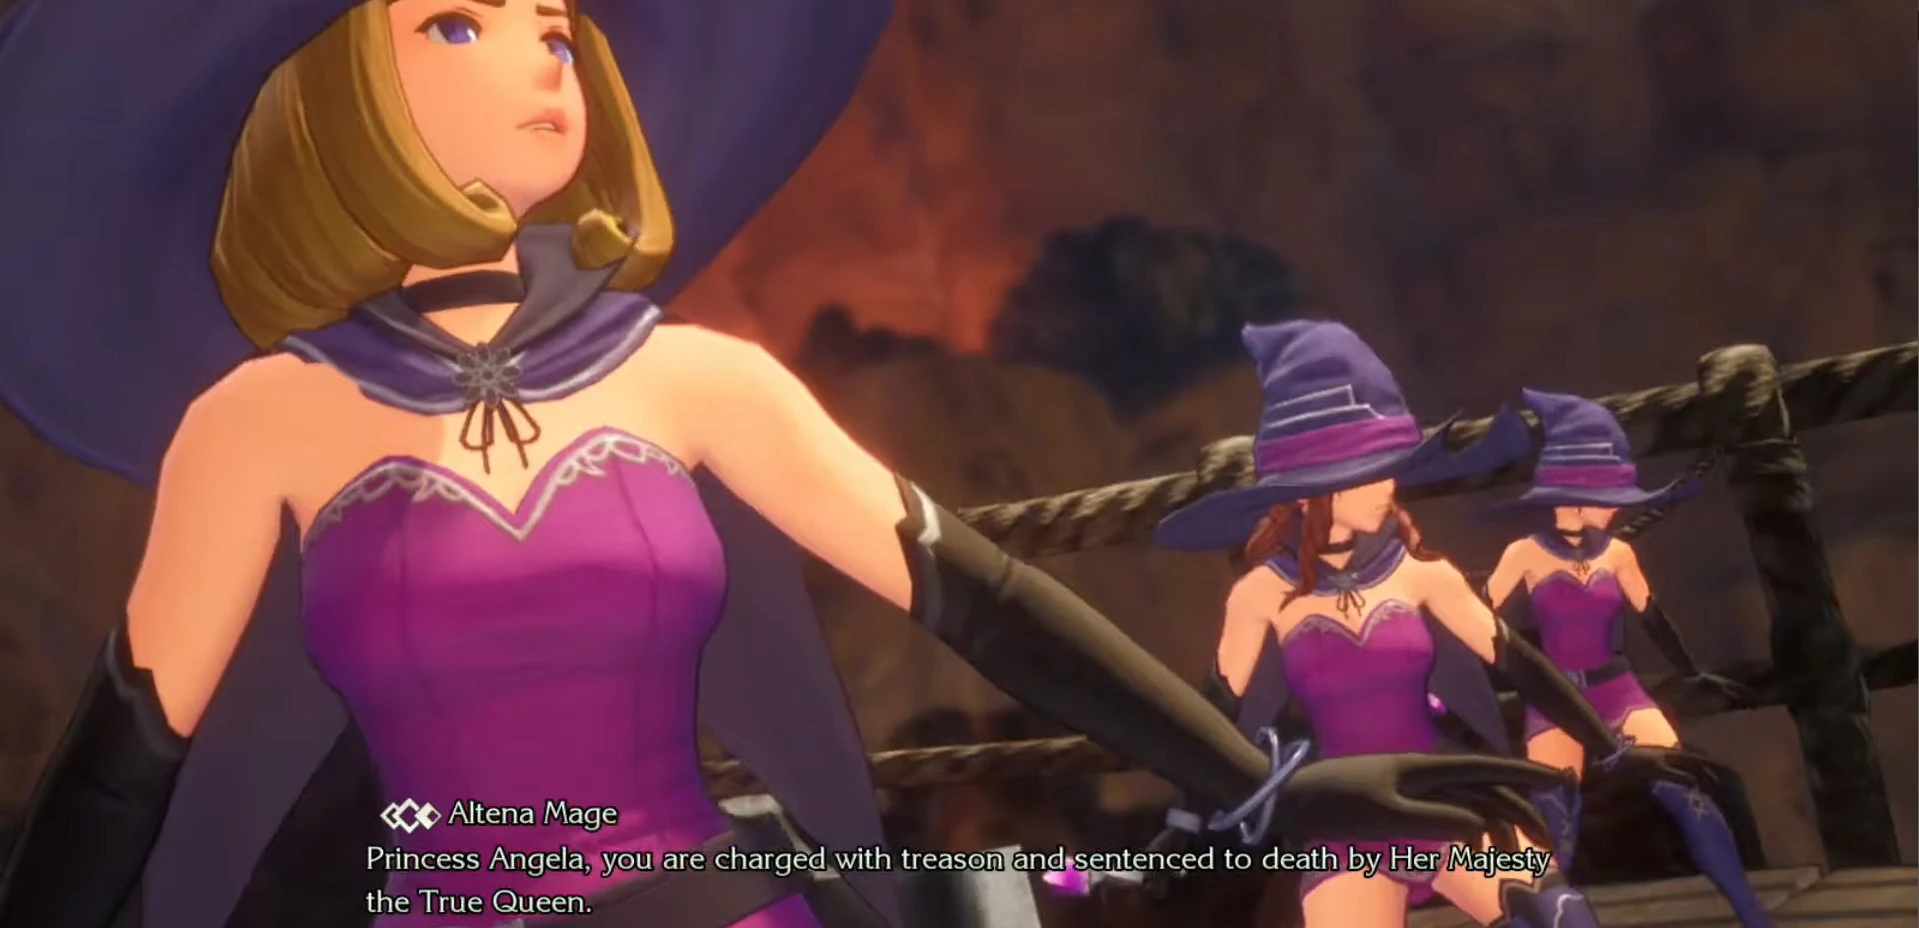
Shortly after, the ship anchors at Maia's port, leaving the party to ask around town for any new leads. After discussing with a few townfolks, they discover that a kooky inventor named Von Boyage is working on some weird contraption. The party pay him a visit and discover that he almost completed a big cannon out of his courtyard. Afterwards, they learn that they could meet with the Hero King of Valsena to know more about each Mana Stone location. The main way to reach him would be to go on the Golden Road, then cross the big bridge in Stonesplit Gap to finally reach the eastern part of Molebear Moors where the Kingdom is located. Our trio of heroes decide to venture out in the open in hopes of getting more answers from the King of Valsena and eventually reaching Stonesplit Gap. While they attempt to cross the ravine, they encounter Altenish mages scouting the vicininty.
Altenish mages in Stonesplit Gap
The mages trap the party on the bridge while unleashing two mechanical golems to attack them. After a long and arduous struggle, our heroes finally manage to defeat the machines albeit only partially, since one of them suddenly detonates and manages to destroy the only way leading to Valsena on land. Stranded on the eastern side of the ravine and disheartened, the party decides to leave the area and heab back to Maia to search for another way to infiltrate Molbear Moors. They stumbled on Von Boyage once again telling them that his newly finished cannon needs nitromyte for it to function and that the Dwarves living near Stonesplit Gap might have some left. Undeterred, our main characters venture back to the rocky abyss to find the entrance to their village. .
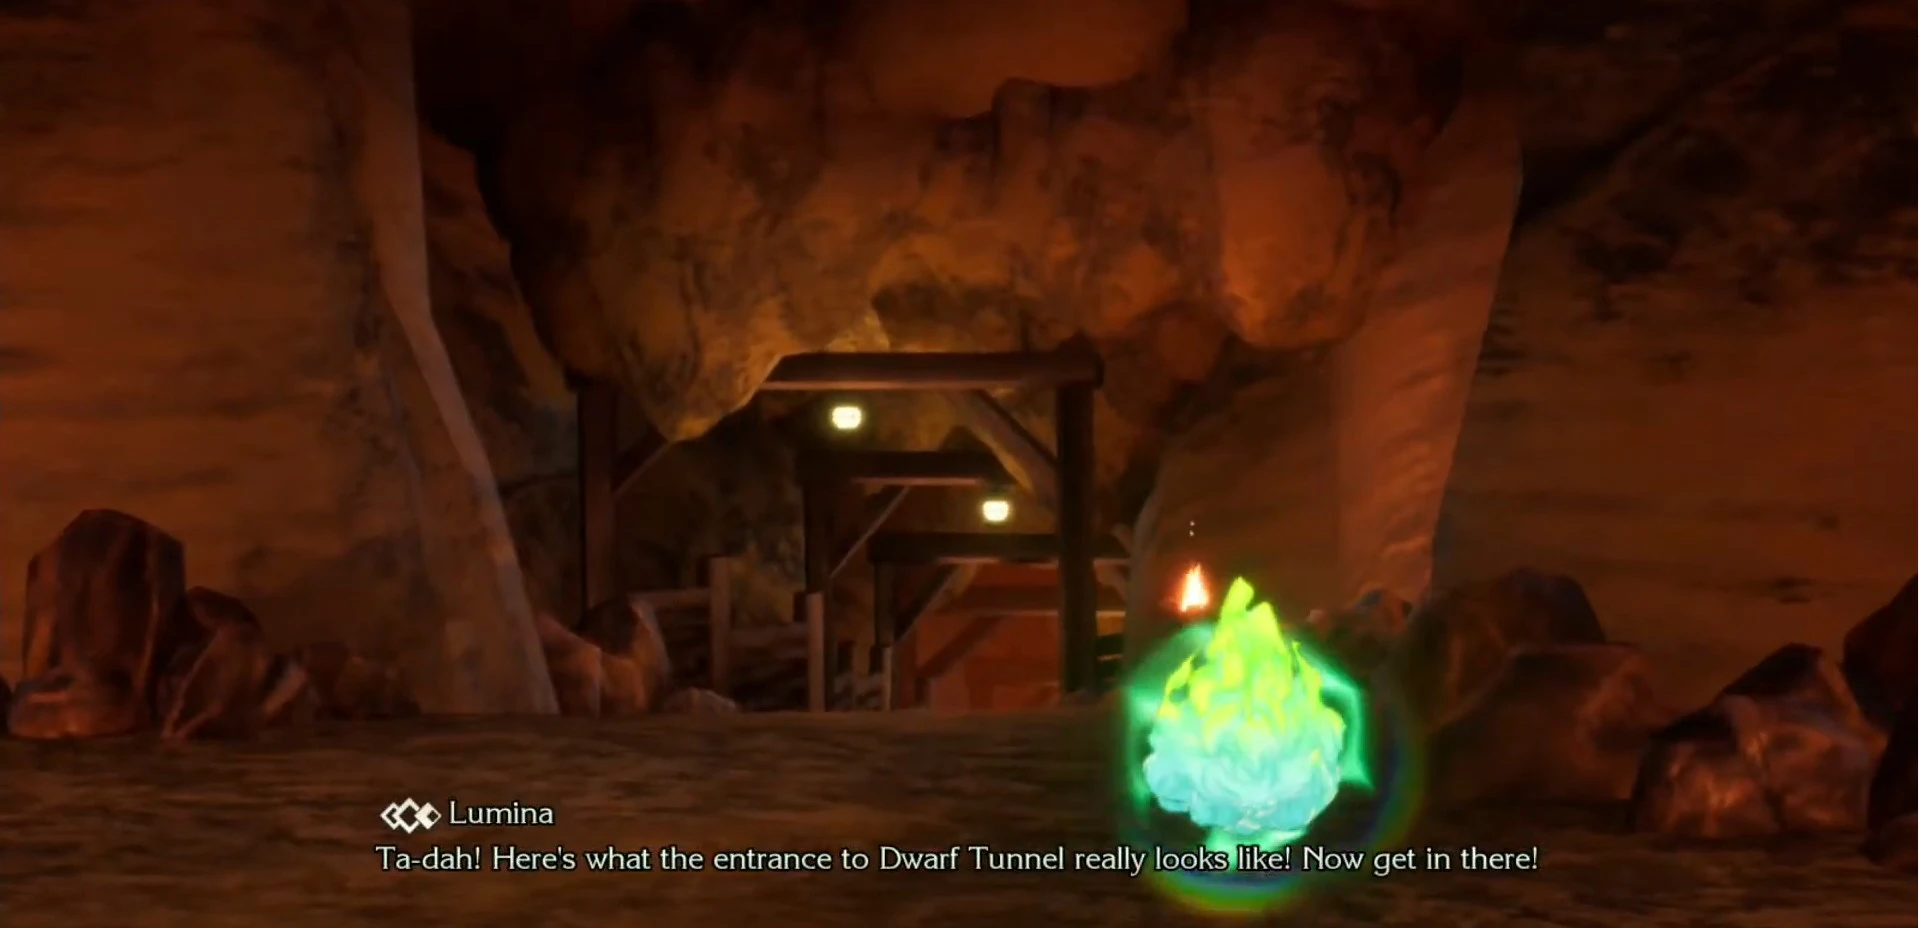
Fortunately, Lumina pops out at the right time and uses his magic to dissipate an illusion in a cavern, revealing a downward path leading to the Dwarven settlement. Here our heroes mingle with the locals trying to inquire about ways to get Nitromyte. A shopkeeper finally tells them that Watts, a famous Dwarf and Nitromyte seller has gone deeper into the tunnels and that he would certainly lend them some should the party find him. Another kind dwarf opens a path toward the tunnels for our heroes with its pickaxe. After wandering near the tunnel's entrance, the party meets the famous dwarf who eagerly tries to sell them the precious explosive for an exorbitant amount. Whether the party buys his ware or not, Watts explains his disappearance from the village by telling our heroes that the recent increase in quakes and rumbles in the area made him worry about the earth elemental, Gnome.

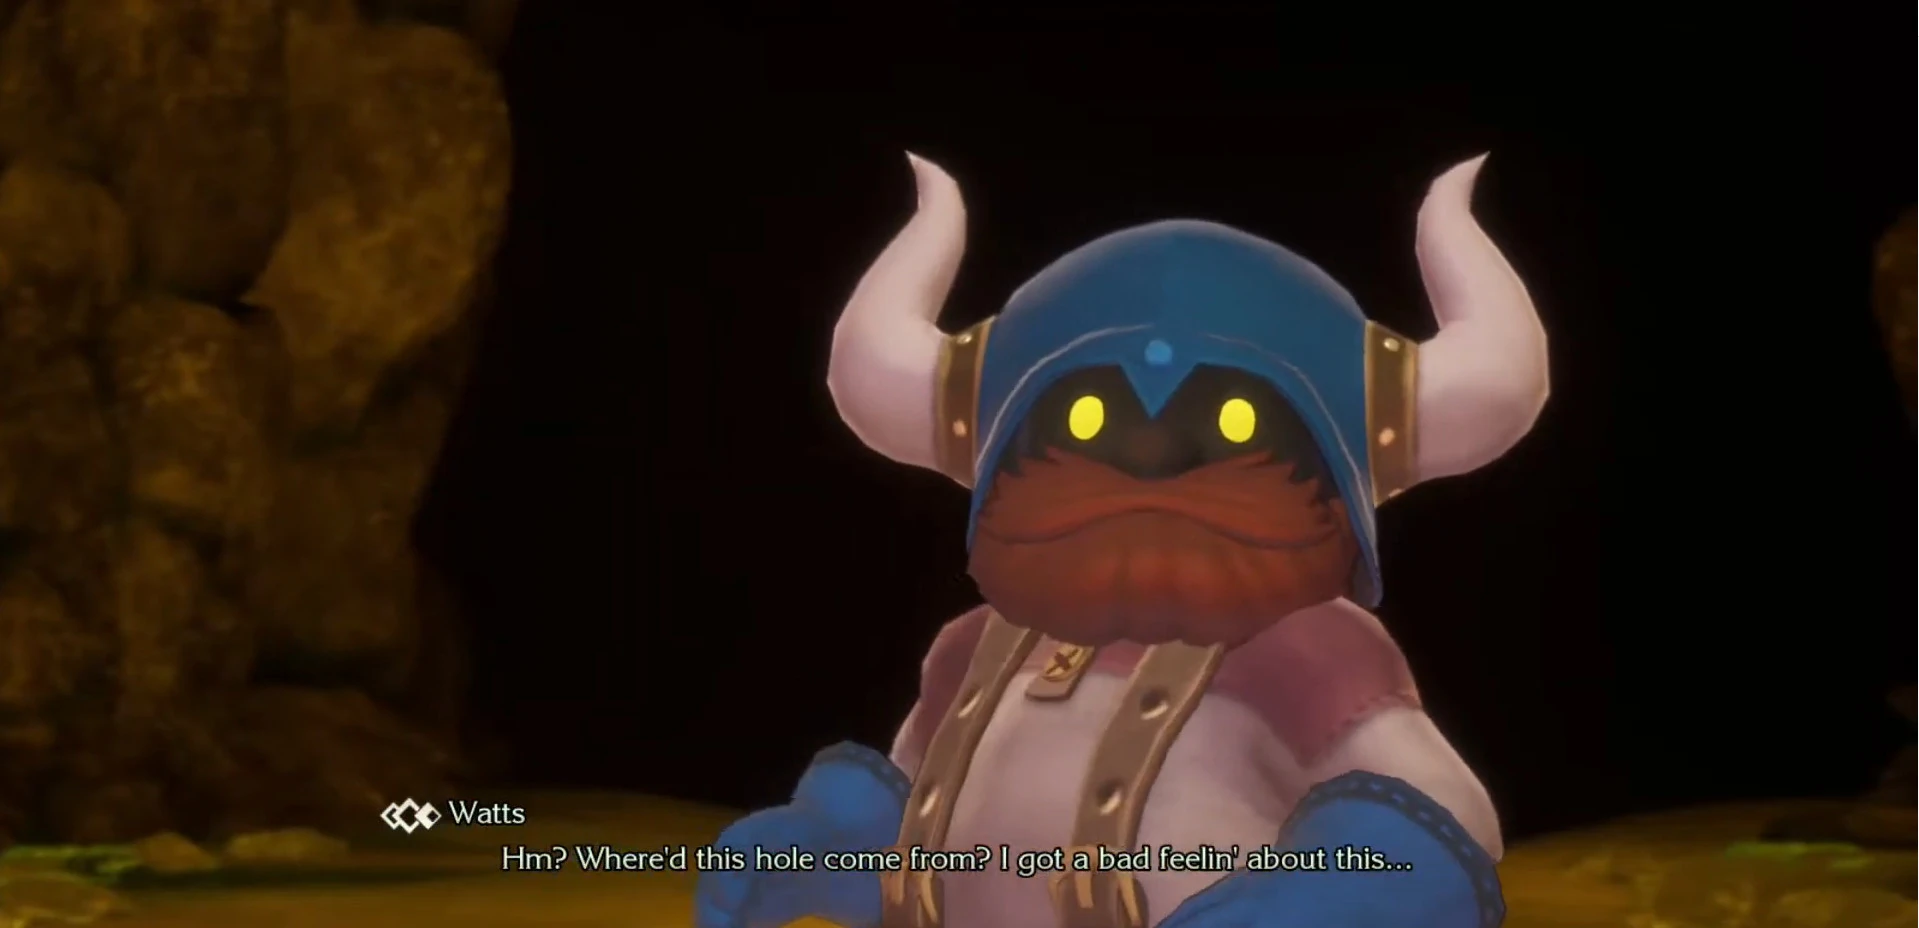
Watts having a bad feeling in Dwarf Tunnels
He then storms off to searching deeper into the tunnels, leaving the party alone. The party agrees on helping Watts searching for Gnome and follow the dwarf in the earthen maze. Later, they run across what seems to be a dead end with Watts in the middle. The small chap warns them to be careful and that he has a bad feeling. A loud quake comes out which scares Watts out of the room while a monstrous mole emerges from one hole. Our party is forced to brawl with the feral beast, eventually managing to be victorious. The earth spirit appears before our trio with Watts rejoining them in the back. It turns out the beast was the legendary subterranean monster that surfaces in Gem Valley near Stonesplit Gap once every 1,000 years. Fortunately the monster did not harm Gnome and the earth spirit happily joins the team. With the help of Watts lending them Nitromyte for free this time, the party returns to the surface and head straight toward Von Boyage's house in Maia.
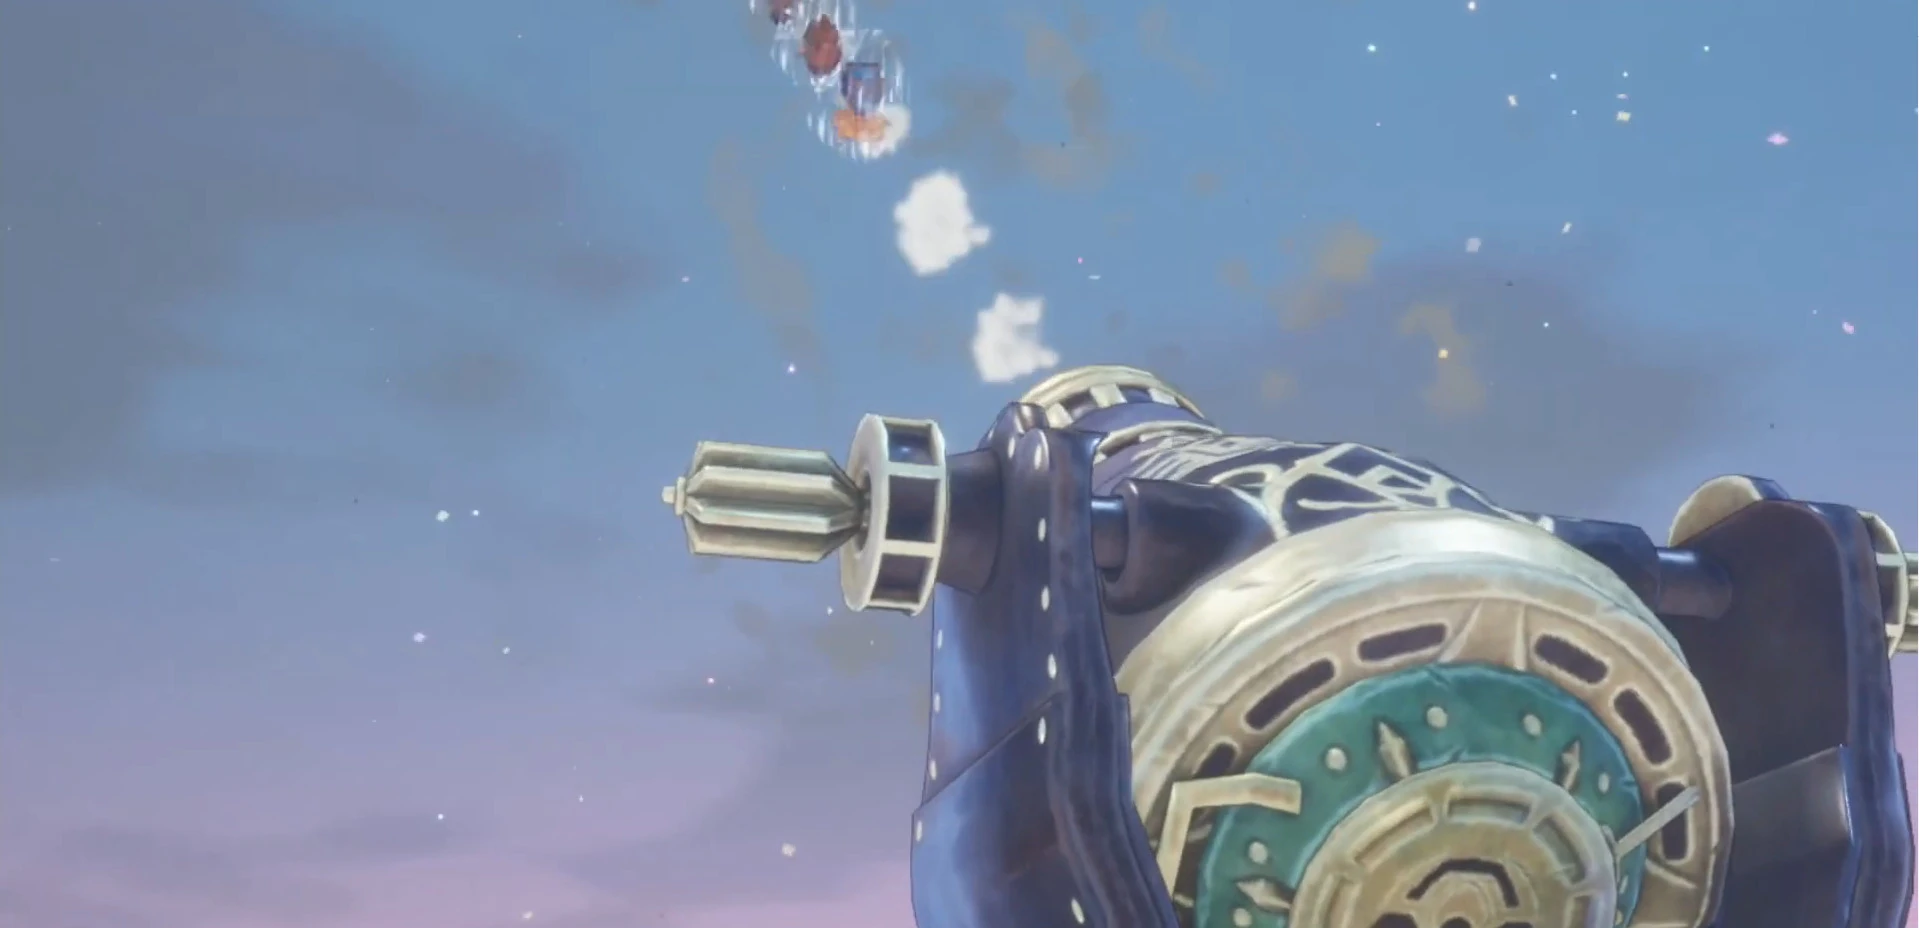
The inventor gladly invite the party to climb the giant cannon and soon they can be seen flying toward their next destination by air. After an uncomfortable landing, they suddently realize that Von Boyage's aim was clearly off and sent them straight in western Molbear Moors territory, forcing them to use multiple underground systems in order to reach the Kingdom of Valsena. After jumping in and out of several holes in the vast plain, they ultimately reach their destination, only to find out that the kingdom was assailed by Altenish forces. They run toward the castle to discover that most of the local guards were incapacitated by their invaders.
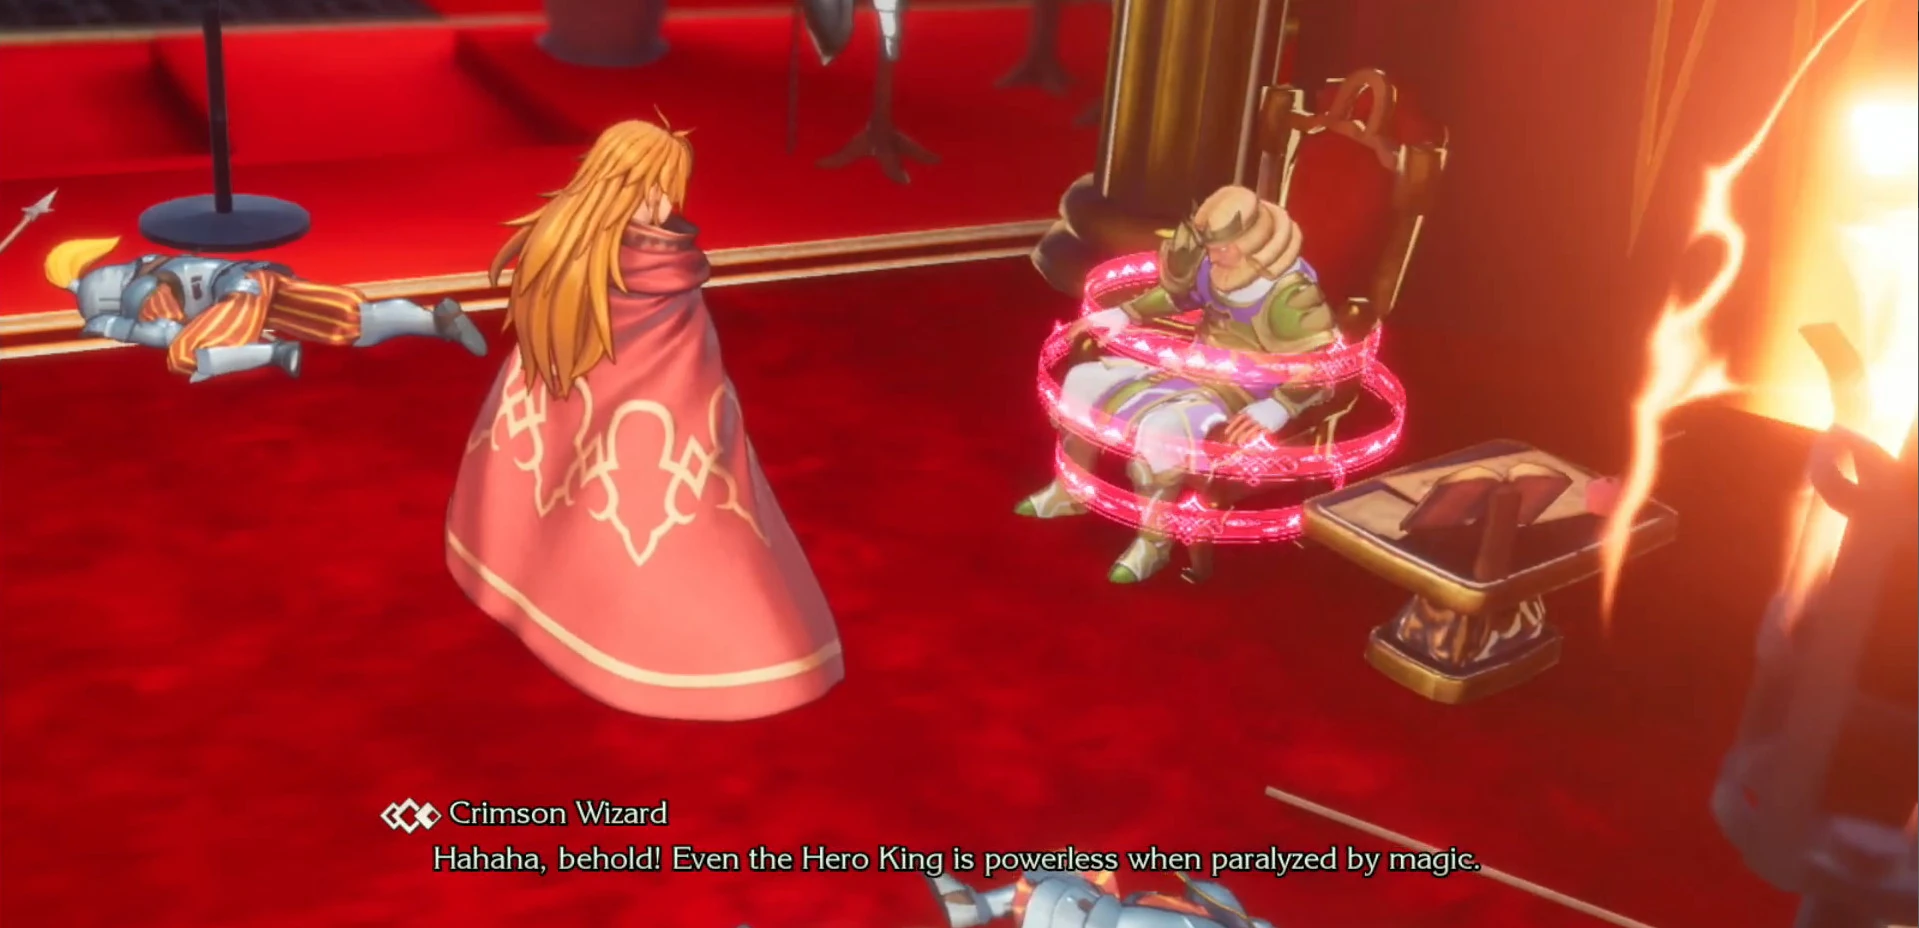
Hero King Richard being paralyzed by the Crimson Wizard
After piercing through the enemy's defense, our heroes finally meet with an ensnared King Richard and a mysterious wizard to his side. The robed man reveals himself to be the Crimson Wizard and head of the leading forces of Altena, trying to activate the Mana Stones by subjugating other kingdoms before any retaliation. The party storms the throne room before the evil wizard has a chance to injure the King further, which forces the invading troops to retract. Our heroes then have a proper meeting with the Hero King Richard in which they inquire about the remaining Mana Stones and their guarding elementals. The King entrust them to go to Palo by boat from Beiser where they can find the Windstone in Heavensway near the Kingdom of Laurent. He also asks for the main characters to return to him once they gain the wind elemental's power.
After bidding farewell to the King, they head to Valsena town to find a way to return to the southern part of the continent since the bridge in Stonesplit Gap is still down. One townsfolk shares that a cannon has been constructed in the castle's training grounds, which gives our hero an incentive to investigate the fort. They find out that the man tending to the Cannon is none other than Von Boyage's brother Von Jour who says that he's still setting up his sibling's invention at the moment. Our heroes decide to kill some time around town, then return to the jolly guy after a while. His brother is revealed to be a better shot than Von Boyage since they land directly in his backyard in Maia after being shot. The main characters take on the Golden Road once again to its southern end and finally end up in the Merchant Town Beiser. Here they find a ferry to Palo which brings them one step closer to the Windstone.
Story Variations[]
Depending on which playable characters the player has chosen, the following events may or may not happen:
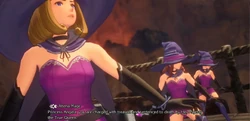
- If the Chosen is male and talks to Angela in Jadd, she will have woken from her rest, shocked that a pervert would bother her. In response, she will scold and slap him. If the Chosen is Riesz, then nothing happens.
- Charlotte is friendlier to Faerie when the two meet, given the former's family connection. The others express various degrees of disbelief, also treating her as more of an unwelcome guest than a companion at first. All six will, however, express varying degrees of disgust when Faerie reads their mind to reveal their personal wish.
- If Charlotte is the Chosen, she will go through Cascade Cavern as the others do, with only Companion 1 to accompany her. Companion 1 will also have broken her fall.
- If Charlotte is Companion 2 or 3, she will temporarily leave the party once they reach the Temple of Light, for fear that she will be reprimanded for suddenly leaving the temple. She rejoins when the party picks up their assignment and leaves the temple grounds.
- If Charlotte is in the party, then as they leave Maia for the Golden Road, a sea captain will give his report on the Priest of Light and Heath. Charlotte is moved to tears, leaving the others to console her.
- If Angela is in the party, then the Altenish mages will attempt to capture her at Stonesplit Gap.
- If Duran is in the party, the Altenish mages will recognize him as a Valsenian soldier and try to kill him and his companions at Stoneplit Gap.
- If Duran and Angela are both in the party in the aftermath of the Machine Golem boss fight, they have a little argument over what happened.
- If Duran is not in the party, he will stop the party on the Molebear Moors to inform them of the Altenish raid and ask them to deliver a message to the King when they meet. Duran will later rush in when the party saves the King.
- If Duran or Angela are in the party, they will attempt to attack the Crimson Wizard who dodges the attempt. Crimson Wizard will mock Duran for trying to challenge him again if he's the one who attacks. If Angela attacks, Crimson Wizard taunts Angela for being labeled a fugitive of her own country.
- If Angela is in the party or if she and Duran are both in the party when talking with King Richard, the king will drop a hint about Angela's origins, who demands to know more, causing Duran to berate her for her rudeness.
- If Riesz is in the party, she'll gasp once King Richard mentions going to Laurent to get Sylphid's help.
- If Duran is in the party, then his house in Valsena will be barred shut.
- If Reisz is in the party, she will threaten the Black Market slaver once finding out he sold off Elliot to Mallochio.
Major Events[]
Objectives[]
- Find a way to escape Jadd. (everyone except Charlotte)
- Nap until nightfall. (everyone except Charlotte)
- Head to Cascade Cavern. (everyone except Charlotte)
- Find a way to break the barrier. (everyone except Charlotte)
- Head to the inn.
- Chase the strange light!
- Hurry to Astoria!
- Head back to Cascade Cavern.
- Head to Holy City Wendel.
- Seek an audience with the Priest of Light.
- Search for the elemental of light.
- Leave Cascade Cavern.
- Head to the docks.
- Look for leads in Maia.
- Head to Valsena.
- Look for leads in Maia.
- Look for leads about nitromyte.
- Find Dwarf Village.
- Find some nitromyte.
- Look for Watts.
- Chase after Watts. (if not bought the nitromyte)
- Head back to Von Boyage.
- Head to Valsena.
- Hurry to the Hero King.
- Find a way to Beiser.
- Wait for the cannon to be finished.
- Find Von Jour.
- Head to Beiser.
- Head to the port.
Chain Abilities Learned[]
- HP Boost (with the Priest of Light)
- MP Boost (optional) (with the Jadd Noble)
- Blacksmith (optional & missable) (with Watts)
- Pride (optional & Duran only) (with Hero King Richard)
- Personal Style (optional & Duran only) (with Bruiser)
- Life Wisdom (optional & excludes Duran) (with Stella)
- Will to Fight (optional) (with Von Jour)
- Magic Switch (optional) (with the Aurora Sisters)
- Stat Down Resistance (optional & Riesz only) (with Slave Trader)
Character Debuts[]
- Ludgar (Jadd, for everyone except Kevin)
- Duran (Jadd)
- Angela (Jadd)
- Kevin (Jadd)
- Hawkeye (Jadd)
- Riesz (Jadd)
- Ponta (optional)
- Faerie (Rabite Forest)
- Charlotte (Cascade Cavern)
- Priest of Light (Temple of Light, for everyone except Charlotte)
- Mik (optional) (Temple of Light, for everyone except Charlotte)
- Lumina (Cascade Cavern)
- Von Boyage (Maia)
- Li'l Cactus (Golden Road)
- Watts (Maia)
- Gnome (Dwarf Tunnels)
- Duran (if not in party) (Molebear Moors)
- Crimson Wizard (Castle Valsena, for everyone except Duran & Angela)
- Hero King Richard (Castle Valsena, for everyone except Duran)
- Von Jour (Castle Valsena)
- Bruiser (optional) (Castle Valsena, for everyone except Duran)
- Stella (optional) (Valsena)
- Wendy (optional) (Valsena)
- Matelo (optional) (Beiser)
- Aurora Sisters (optional) (Beiser's Night Market)
- Slave Trader (optional) (Beiser's Night Market)
Bosses Fought[]
- Fullmetal Hugger (Cascade Cavern)
- Machine Golem R (x2) (Stonesplit Gap)
- Jewel Eater (Dwarf Tunnels)
Visited Locations[]
- Jadd Stronghold
- Rabite Forest
- Astoria
- Cascade Cavern
- Wendel
- Temple of Light
- Cascade Cavern
- Maia
- Golden Road
- Stonesplit Gap
- Dwarf Village
- Dwarf Tunnels
- Molebear Moors
- Valsena
- Beiser
- Beiser's Night Market (optional)
| v · e · d Trials of Mana Story
|
|---|
| Character Introductions |
| Duran's Introduction · Angela's Introduction · Kevin's Introduction · Charlotte's Introduction · Hawkeye's Introduction · Riesz's Introduction |
| Chapters |
| Chapter I · Chapter II · Chapter III · Chapter IV · Chapter V · Chapter VI · Chapter VII |